In the first article of my mandala series I shared with you an Introduction to Mandalas guide and a video tutorial with 5 repeat pattern art drawing methods for mandalas. I hope you found them helpful. If you missed the articles, you can jump back to it by clicking here.
On the Agenda for Today: A quick tutorial on how you can repurpose your mandala’s and make smaller pieces of art from them. And an ATC Swap invite too!
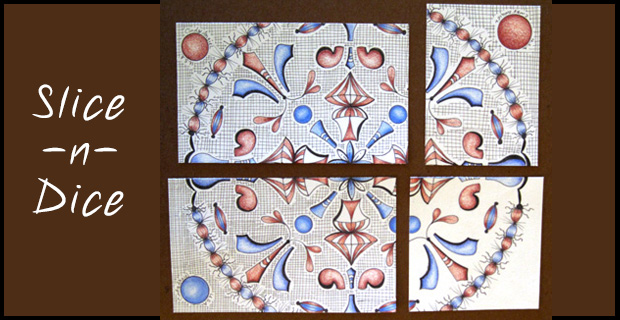
Slicing Things Up
Remember last week when I shared with you the Red, White, and Blue art pieces I created for the “Proudly We Wave” swap ? Well those pieces were made by slicing up a mandala I drew. And from that one mandala I was able to create 4 smaller pieces of art PLUS I scanned the original before slicing it up so I can use it in my print shop and for other projects in the future.
Friendly TIP:
Scanning your art work gives you the opportunity to remix and repurpose your art!
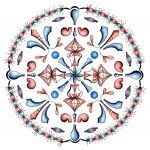
Scanned Copy of Original Mandala
So here’s how I went about creating these smaller works from the larger mandala: First I drew out a circular grid on my paper and drew out my mandala. Colored it in. Then I scanned the page. To the right is a copy of what the original mandala looked like.
Once I had a good scan of the mandala in place for future use, I took the original and sliced it up into smaller pieces of art. First I had to slice up two sections measuring 3″x5″ because that was the art size for the Proudly We Wave Swap.
To each of these two slices I added a tight grid background that looks kind of like a screen you might find on your windows at home. I also added an extra orb in the corner and included my country and name to the front of the art piece. This was so that the swapper who received my art would know I was the artist and the colors represent the USA flag. Jump back over to the original posting to see what they looked like in the end.
Why slice up the original instead of the copy? Because art swaps require original art created by the artist. No copies allowed!
Red, White, and Blue ATC
Then I sliced off a piece that measured 2 1/2″ x 3 1/2″ for an Artist Trading Card. Adding an extra orb along with my name and country on it as well. I also added a white flower brad to the card for a 3-D touch. While it is similar to the 3×5″ swap items – it’s not really a part of that project. But now I have an extra ATC to trade. 😀 Are you interested?

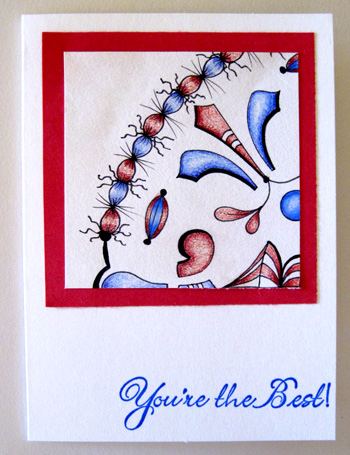
Red, White, and Blue Greeting Card
Now I had this smaller size slice left over and decided to not do much else with it, other than mounting it onto a coordinating piece of card stock (red) and then included it as the focal point on a greeting card. What do you think? Too weird? It doesn’t really have anything to do with anything, but I thought the colors made for a nice design on the front of this card just the same.
Framed Patriotic Mandala
I have just a few more tweaks to put on the scanned image and then it will go into my print shop. Matted in red and blue with a black frame it’ll look like this:
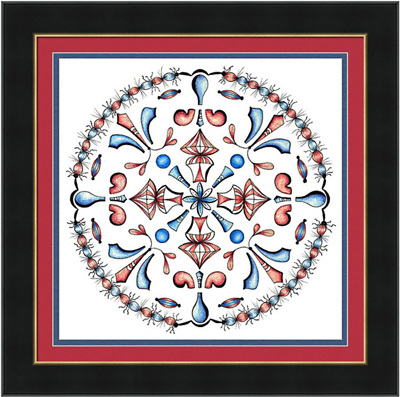
Proudly We Wave – Framed
Wanna Play with Me?
I’m hosting a Slice-N-Dice Mandala ATC swap here on my blog and another one inside the LineWeaving Community. You’re invited to join one or both of them! All the details for the one with the folks at LineWeaving.com can be found inside the community forums in the “Hosted Swaps” area. If you’d like to join a RainbowElephant swap, see below instructions.
ATC Swap Instructions:
- First sign up for the swap by leaving a message in the comments below OR by sending me an email at: cindyangiel [ at] gmail [dot] com
You must sign up by 15 June 2014- View the video below and then create a 5-6″ mandala.
- Slice it up so you get at least two miniature pieces of art that are 2 1/2″ x 3 1/2″ for your Artist Trading Cards.
- Mount these small pieces of art on card stock. (2 1/2″ x 3 1/2″ maximum size)
- Add to the back – your name, country where you are located, and the date.
- Send both ATCs to me along with a self addressed envelope for me to return your traded cards in.
(I will email you the address you need to send to)
You must mail your cards to me by 20 June 2014- Then send me an email letting me know you mailed your cards.
- As soon as I have received the cards from everyone who signs up, I’ll return cards to you! 😀 That should be by the 30th of June if not sooner.
Video Showing Steps to Create Your ATC’s for this Swap
Note: You will probably have extra ATC’s left over if you follow these instructions. If you’d like to trade them with other swappers – please consider joining the Mandala Slice-n-Dice swap inside our LineWeaving community forums! You’re sure to have more swapping opportunities on the inside!
Have You Ever Diced It Up?
Have you ever created smaller slices of art from from a larger piece? Scanned your art and reused the copies for other projects? Repurposed a piece of handmade art? I’d love to hear about your experiences with this and I know visitors to my blog would enjoy hearing how others have done this as well. Please share your thoughts by leaving a response below and maybe you’ll inspire someone a make it their special today!
Here’s a picture of the cards I created this week from the mandalas I made in the video I shared on Monday and the above video too. I added some decorative brads to a few of the ATC’s for a bit of 3-D fun! 😀
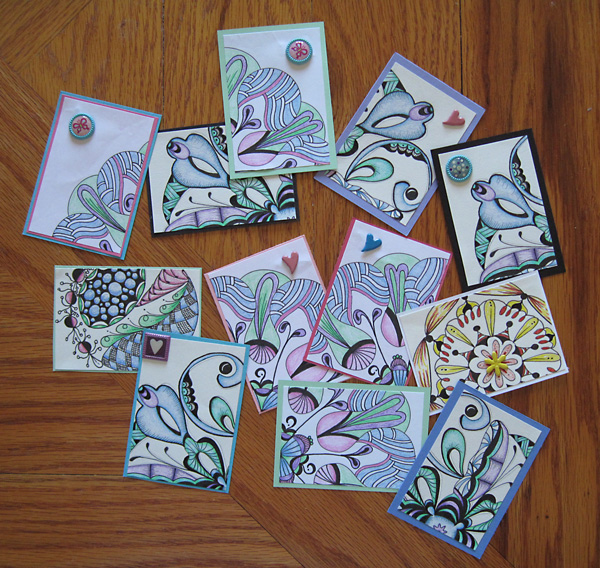
Artist Trading Cards Diced from 4 Mandalas
I look forward to hearing from you!
~Cindy
P.S. Next up in the Mandala Series is a tutorial for my rubber stamping friends!


Hi Cindy, would love to join your swap for the Diced Mandala!